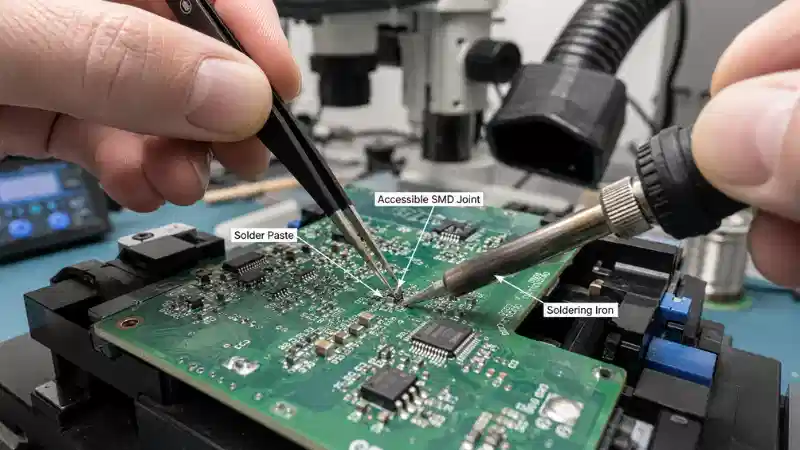
Solder paste handling determines SMT assembly yield more than most engineers care to admit. The material itself-a suspension of metal powder in flux medium-behaves unpredictably when storage, printing, and reflow parameters drift outside acceptable windows. Getting this right requires understanding the metallurgy, rheology, and thermal dynamics at play.

What's Actually Inside the Jar
The composition matters. You're working with 85-92% metal powder by weight, typically SAC305 (96.5Sn/3.0Ag/0.5Cu) for lead-free applications, suspended in a flux system containing activators, rheology modifiers, and solvents.
Particle size classification follows IPC J-STD-005:
Type 3: 25-45μm (standard pitch)
Type 4: 20-38μm (fine pitch down to 0.4mm)
Type 5: 15-25μm (ultra-fine, 0201 components)
Type 6 and beyond for 01005
Here's what nobody tells you in the datasheets: finer powder oxidizes faster. That Type 5 paste sitting on your shelf loses working life quicker than Type 3. The surface-area-to-volume ratio works against you.
Storage-Where Most Problems Actually Start
I've seen production lines shut down because someone left paste out overnight. The damage isn't always visible.
Refrigeration requirements:
Keep it between 0-10°C. Not frozen-freezing causes flux separation that never fully recovers, even after mixing. The metal powder settles, the volatiles redistribute unevenly, and your first prints of the day will show it.
Warm-up before use takes longer than people schedule for it. A 500g jar needs minimum 4 hours at room temperature, still sealed. Opening cold paste introduces condensation directly onto the powder particles. Oxidized powder doesn't wet properly. Period.
The 6-month shelf life printed on containers assumes perfect conditions. Real-world refrigerators cycle temperatures. Doors get opened. That paste you bought in January might print fine in March but give you random solder balls by April.

Stencil Printing Parameters
This is where the craft comes in.
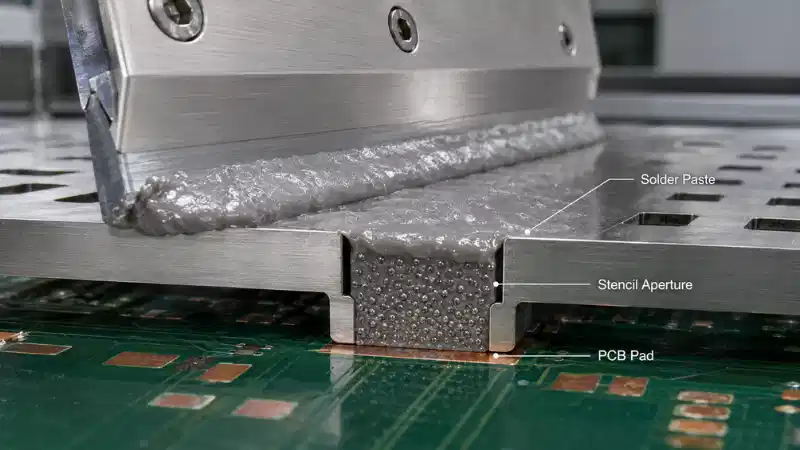
Squeegee pressure runs 3-8 kg typically, but the actual number depends on paste viscosity, stencil thickness, aperture density-too many variables to give a universal setting. Start at 5 kg and adjust based on what SPI tells you.
Print speed creates a tradeoff nobody mentions in training materials: faster speeds (60-80mm/s) improve throughput but reduce aperture filling on fine-pitch designs. Slow down to 25-40mm/s for 0.4mm pitch and below. The paste needs time to roll into apertures, and rolling action-that cylinder of paste moving ahead of the squeegee-determines fill quality.
Separation speed after printing should run 1-3mm/s for standard work. Drop to 0.5mm/s for ultra-fine pitch. Fast separation causes peaking, where paste pulls up into peaks rather than releasing cleanly. Those peaks slump sideways and bridge adjacent pads.
Stencil design affects everything downstream:
| Aperture Rule | Formula | Why It Matters |
|---|---|---|
| Area ratio | Aperture area ÷ wall area ≥ 0.66 | Below this, paste sticks to walls |
| Aspect ratio | Width ÷ thickness ≥ 1.5 | Ensures release |
For a 0.12mm thick stencil printing 0.25mm apertures, the math barely works. This is why 0201 assembly often requires 0.08mm or even 0.06mm stencils with Type 5 paste. The tolerances compound.
On the Line: Time Limits Nobody Follows
Once paste hits the stencil, oxidation begins. The clock starts.
Maximum stencil life: 8 hours (though 4-6 is safer)
Maximum time before reflow after printing: 4 hours
Kneading interval during extended runs: every 30-60 minutes
That last point gets ignored constantly. Paste thins with shear (thixotropic behavior), then slowly recovers viscosity at rest. But after 20-30 print cycles, the rheology changes. Kneading with a spatula-30 seconds, folding motion-resets the structure.
Stencil cleaning frequency depends on your failure mode. Start with every 10 prints using dry wipe, wet wipe every 30. Vacuum cleaning addresses paste buildup in apertures but won't fix dried residue. If you're seeing bridging appear after 15-20 prints when it wasn't there at start-up, your cleaning interval is wrong.
Reflow Profile Development
The profile makes or breaks the joint.
Preheat zone(ambient to ~150°C)
: Ramp at 1-2°C/s maximum. Faster ramps cause solder balls from explosive volatilization. The flux system needs time to activate and reduce oxides on both powder and pad surfaces.
01
Soak zone (150-200°C)
: Hold 60-90 seconds. This is where flux does its work. Too short, you get voiding and poor wetting. Too long, flux exhausts before reflow and joints oxidize.
02
Reflow zone:
SAC305 melts at 217°C. Time above liquidus (TAL) should run 45-75 seconds with peak temperature 235-245°C. Exceeding 250°C risks pad lifting on cheap laminates and accelerates intermetallic growth.
03
Cooling:
2-4°C/s maximum. Faster cooling creates brittle joint microstructure. Slower cooling-particularly with large thermal mass boards-allows intermetallic layers to grow thick.
04
The dirty secret about profile development: start with the paste manufacturer's recommendation, then adjust for your actual assembly. Thermal mass varies by board design. Component mix matters. A profile perfect for one product fails on another.

Defects You'll Actually See
- Solder balls scattered around chip components: Nine times out of ten, it's either printing defect (slump before placement) or preheat ramp too aggressive. Check your stencil aperture size against pad size-paste extending beyond pad boundaries slumps and balls during reflow.
- Tombstoning on small passives: Unequal heating of component terminations. The side reaching liquidus first pulls the part upright as surface tension acts on the molten side only. Fixes include adjusting placement (centering), pad design (thermal balance), and sometimes profile modification-but honestly, pad geometry is the root cause usually.
- Head-in-pillow on BGAs: Paste on pad reflows but doesn't coalesce with ball on component. Caused by board or component warpage during reflow. The ball and paste both melt but physical gap prevents coalescence. Increasing peak temperature helps sometimes. So does reducing TAL to minimize warpage. Vacuum reflow solves it but costs money.
- Voiding: Some amount is inevitable with SAC alloys-typically 10-25% void area in BGA joints is considered acceptable for consumer electronics. Automotive specs demand under 10%. Reducing voids requires extended soak, controlled ramp-to-peak, and sometimes specialty low-voiding paste formulations that cost significantly more.
Inspection Methods
SPI (solder paste inspection) after printing catches 70%+ of defects before they become expensive. Measure height, area, and volume. Set limits tight on critical components-±35% volume for 0201, ±50% for larger passives.
Post-reflow AOI catches placement issues and joint formation defects. X-ray becomes necessary for BGAs, QFNs, and anything with hidden joints. If you're running BGAs without X-ray capability, you're flying blind on ~30% of your joints.
Process capability (Cpk) on paste deposit volume should exceed 1.33 for stable production. Below 1.0 means your process is out of control. Fix printing parameters before adding production capacity.
Environmental and Safety Considerations
Lead-free paste dominates commercial electronics due to RoHS requirements. If you're still running SnPb for aerospace or medical exemptions, keep it physically separated from lead-free lines. Cross-contamination causes joint reliability failures.
Work area ventilation matters-flux fumes irritate respiratory systems over long exposure. Gloves prevent both contamination of paste and skin absorption of flux chemicals. Dispose of expired paste and cleaning materials as hazardous waste per local regulations.
No-clean flux residues remain on the board permanently. They're designed to be benign, but high-humidity environments can still cause issues with certain formulations. Water-soluble flux must be cleaned within 24 hours of reflow-residues become progressively harder to remove and eventually corrode copper.
The reality of solder paste usage is that it's 60% following established rules and 40% understanding your specific materials, equipment, and product well enough to break those rules intelligently. Paste from different manufacturers behaves differently even with identical alloy specifications. Your printer has quirks the manual doesn't cover. Learn them.