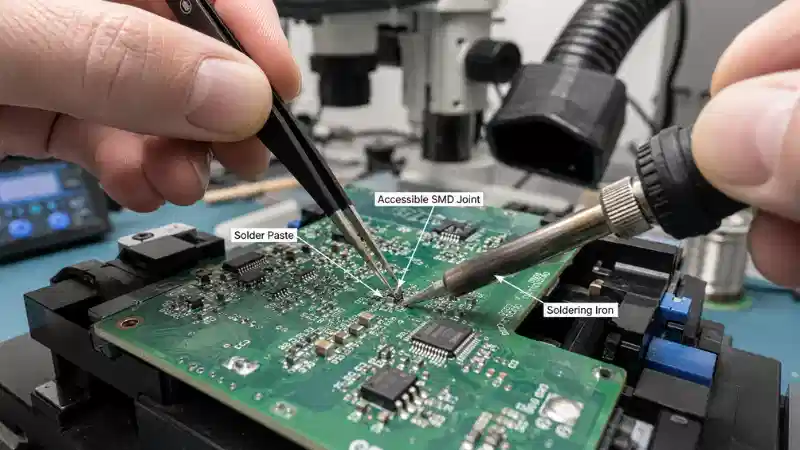
Tin solder-technically classified as soft soldering within the broader brazing family-functions through capillary action and metallurgical bonding at temperatures below 450°C. The process exploits the wetting phenomenon where molten solder alloy penetrates and fills gaps between metal surfaces, forming intermetallic compounds (IMCs) at the interface upon solidification. Unlike fusion welding, the base metals remain unmelted; the joint integrity depends entirely on the formation of this thin alloy layer, typically Cu₆Sn₅ and Cu₃Sn when soldering to copper substrates.
The Stuff Nobody Tells You When You're Starting Out
Here's the thing about solder that took me way too long to figure out: it's not glue. I spent my first month treating it like some kind of metallic adhesive, and my joints looked absolutely terrible. Dull, grainy, refusing to stick properly.
Solder needs heat on the joint, not on the solder itself. You heat the pad and the component lead, then touch the solder wire to that heated junction. The solder flows toward heat-remember this. It flows toward heat. If you're heating your solder wire directly with the iron tip and then trying to smear it onto a cold pad, you're doing it backwards. The flux will burn off before it can do its job, the solder oxidizes mid-air, and you end up with what's called a "cold joint." Looks like cottage cheese. Terrible conductivity. Will fail eventually.
Lead vs. Lead-Free: The Eternal Debate
The 63/37 Sweet Spot
Eutectic solder-63% tin, 37% lead-melts at exactly 183°C. Not a range. A single point. This matters more than you'd think.
See, most alloys have a "pasty range" where they're partially solid, partially liquid. During this mushy phase, any movement causes internal fractures. The 63/37 composition skips this entirely. Liquid to solid, instantly. That's why old-timers swear by it.
60/40 is cheaper. Melts at 190°C. Has a small pasty range. Honestly? For hand soldering, you probably won't notice the difference. But if you're doing production work or particularly delicate stuff, the eutectic matters.
Lead-Free Reality Check
RoHS compliance pushed everyone toward lead-free around 2006. The most common replacement is SAC305-96.5% tin, 3% silver, 0.5% copper. Melts at 217-220°C.
That 35-degree difference sounds minor on paper. In practice? It changes everything.
Your iron runs hotter. Components absorb more thermal stress. Pads lift easier. The wetting action feels... sluggish. Less forgiving. And the joints look different-slightly grainier surface texture is actually normal for lead-free, not a defect. Took me embarrassingly long to stop trying to "fix" perfectly good SAC joints.
The silver content improves mechanical strength and creep resistance. Useful for applications with thermal cycling. But silver's expensive, so budget lead-free options use Sn99.3/Cu0.7 instead. Works fine for hobby stuff. Don't let anyone tell you otherwise.
One more thing: "lead-free" doesn't mean zero lead. The threshold is 1000ppm under RoHS. Some manufacturers aim for <100ppm to account for contamination during processing.
Flux: The Unsung Hero
I'm going to spend more time on flux than most guides because most guides barely mention it, and that's insane.
Flux removes oxides. Metal surfaces oxidize constantly-copper especially. Oxidized surfaces don't wet properly. Flux contains acids (organic or inorganic) that chemically strip these oxides while you're soldering, allowing the molten solder to actually bond with clean metal underneath.

Types You'll Actually Encounter
Rosin-based (R, RMA, RA):
The classics. Made from pine tree resin. R type is barely active, almost decorative. RMA (Rosin Mildly Activated) handles light oxidation, which covers most scenarios. RA (Rosin Activated) is aggressive-cleans well but leaves corrosive residues if not cleaned.
No-clean:
Modern favorite. Leaves minimal residue that's supposedly non-corrosive. "Supposedly." For high-reliability work, people still clean it anyway.
Water-soluble:
Very active. Excellent wetting. But absolutely must be cleaned with deionized water afterward, or the residue will destroy your board within months. Not exaggerating.
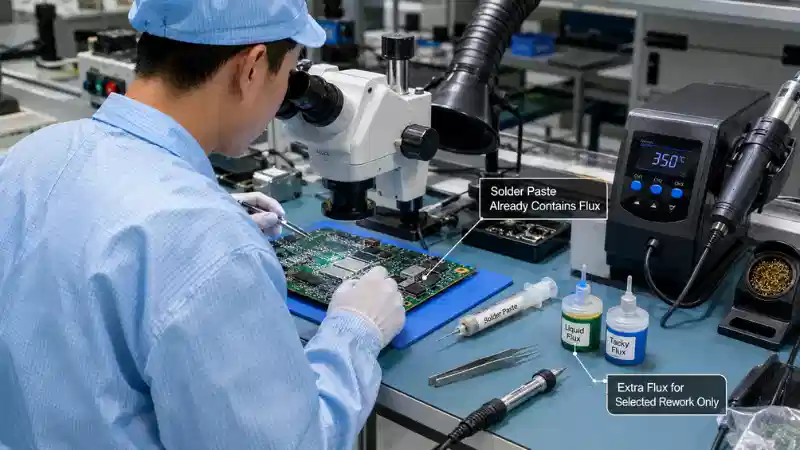
Most solder wire has flux in the core-that's what causes the smoke and sizzle. The percentage matters. 2-2.5% flux content is standard. Less than 1.5% ("low-residue" types) requires cleaner surfaces to begin with.
The Flux Pen Changed My Life
Not being dramatic. Having a flux pen nearby transforms rework from painful to pleasant. Stubborn joint? Dab some flux. Desoldering? Flux first. Bridged pins? Flux and drag-solder.
Iron Selection (Brief Because Everyone Overthinks This)
Get a temperature-controlled station. Not a fixed-wattage plug-in iron. Doesn't have to be expensive-plenty of decent options under $50 now.
Temperature setting: 350-380°C for leaded. 380-420°C for lead-free. That's it. Ignore people who insist on precise numbers like "exactly 357°C"-your tip temperature drops the moment it touches a joint anyway.
Wattage determines recovery time-how fast the tip returns to set temperature after heat transfers to the workpiece. 60W handles most PCB work. For big ground planes or thick wires, you want 80W+. Low-wattage irons force you to hold longer, which causes more thermal damage than just using appropriate power in the first place.
Tip shape: get a chisel tip. 2-2.5mm width. Not conical. Conical tips have terrible thermal transfer-tiny contact area. Chisel tips let you choose your contact surface depending on the joint size. One tip, multiple applications.
Actually Soldering: What Nobody's Diagram Shows
The textbook "five-step method" goes: prepare, heat joint, apply solder, remove solder, remove iron.
Reality is messier.
Sometimes the flux in your wire isn't enough and you need to pre-flux the pad. Sometimes you're soldering stranded wire that wicks solder up inside the insulation if you're not careful. Sometimes the component lead is oxidized and needs pre-tinning before installation. Sometimes there's too much solder and you need wick or a solder sucker.
The "ideal joint" everyone shows-shiny, concave fillet, smooth transition to pad-that's for leaded solder in good conditions. Lead-free joints can look slightly matte and still be perfectly fine. Evaluate based on wetting angle and coverage, not shininess alone.

Timing Feel
Here's what experience teaches: you develop a sense for when the joint is "done." The solder stops moving, settles into its shape, gains that liquid-metal shimmer right before solidifying. Pull the iron during this moment. Too early and you get insufficient wetting. Too late and you risk overheating components.
2-3 seconds for small signal components. 3-5 seconds for larger joints. Ground pins connected to copper pours? Could be 5-8 seconds with a properly heated iron-or forever with an underpowered one.
Common Failures and What They Actually Look Like
Cold joint: Grainy, dull, irregular surface. Sometimes cracked. Caused by movement during solidification or insufficient heat. The fix isn't adding more solder-reheat properly with fresh flux.
Disturbed joint: Similar appearance to cold joint but caused by physical movement while cooling. The internal crystalline structure is fractured. Must be completely reflowed, not just touched up.
Insufficient wetting: Solder balls up instead of spreading. High contact angle. The pad or lead wasn't clean, wasn't hot enough, or flux was depleted. Sometimes all three.
Solder bridge: Shorts between adjacent pins. Too much solder or wrong tip angle. Fix with flux and a clean tip-the surface tension of properly fluxed solder usually separates bridged pins when you drag through with a chisel tip.
Tombstoning: One end of a chip component lifts during reflow. More of an SMT assembly issue than hand soldering, but worth knowing exists.
Pad lifting: Excessive heat broke the adhesive bond between copper and substrate. Usually not repairable. Prevention only: appropriate temperature, appropriate dwell time, don't try to solder on cold boards straight from storage.
Wire Diameter Selection
This gets overlooked.
- 0.5mm: Fine-pitch SMD rework. QFP pins. Annoyingly thin for through-hole.
- 0.8mm: Good general-purpose size. Most hand soldering tasks.
- 1.0mm: Through-hole assembly. Slightly faster solder delivery.
- 1.2mm+: Larger joints. Wire splicing. Anything with significant thermal mass.
Using thick wire on tiny joints wastes solder and makes precise application difficult. Using thin wire on big joints takes forever and requires constant feeding.
Storage and Shelf Life
Solder wire absorbs moisture. The flux core degrades. Old solder splatters, spits, produces excessive smoke, and the joints never look quite right.
Keep it sealed when not in use. Those resealable plastic tubes exist for a reason. In humid climates-Southeast Asia, coastal areas-this matters even more. Some people store opened spools with desiccant packets. Probably overkill for hobbyists, probably necessary for production environments.
Unopened solder wire lasts 2-3 years typically. Once opened? Use within a year for best results. You can use older solder-it just behaves worse.
The Stuff I Wish I'd Known Earlier
Cleanliness matters more than technique. A mediocre solderer with clean surfaces will outperform a skilled one fighting oxidation.
Tip maintenance is boring but essential. Tin your tip before putting down the iron. Every time. No exceptions. A oxidized tip that won't accept solder is useless regardless of how expensive your station was.
Cheaper solder isn't always a bad deal, but unknown-brand solder often contains impurities that affect wetting and joint reliability. For critical applications, stick with recognized manufacturers-Kester, Multicore, Almit, similar. For practice boards? Whatever.
Temperature is a range, not a religion. Obsessing over the "perfect" setting is less productive than developing consistent technique at whatever temperature works for your conditions.
Good lighting and magnification matter more as joints shrink. Modern SMD work basically requires a stereo microscope or good magnifying lamp. This isn't a skill issue-0402 components are just genuinely hard to see clearly with bare eyes.
The learning curve flattens faster than you'd expect. Hundred joints in, you'll have the basics. Thousand joints in, you'll have confidence. Ten thousand? You'll have developed all sorts of personal habits and preferences that technically "shouldn't" work but somehow do for you specifically.
Start with through-hole practice kits. Graduate to SMD. Don't skip the fundamentals trying to jump straight to drag-soldering 0.5mm pitch QFPs-that way lies frustration and destroyed boards.